This field guide is written for clients comparing services and professionals who want a more precise vocabulary for the method. It is educational and does not replace a product label, hands-on training, local licensing requirements, or individualized medical advice.
Alignment is a decision before it is a result
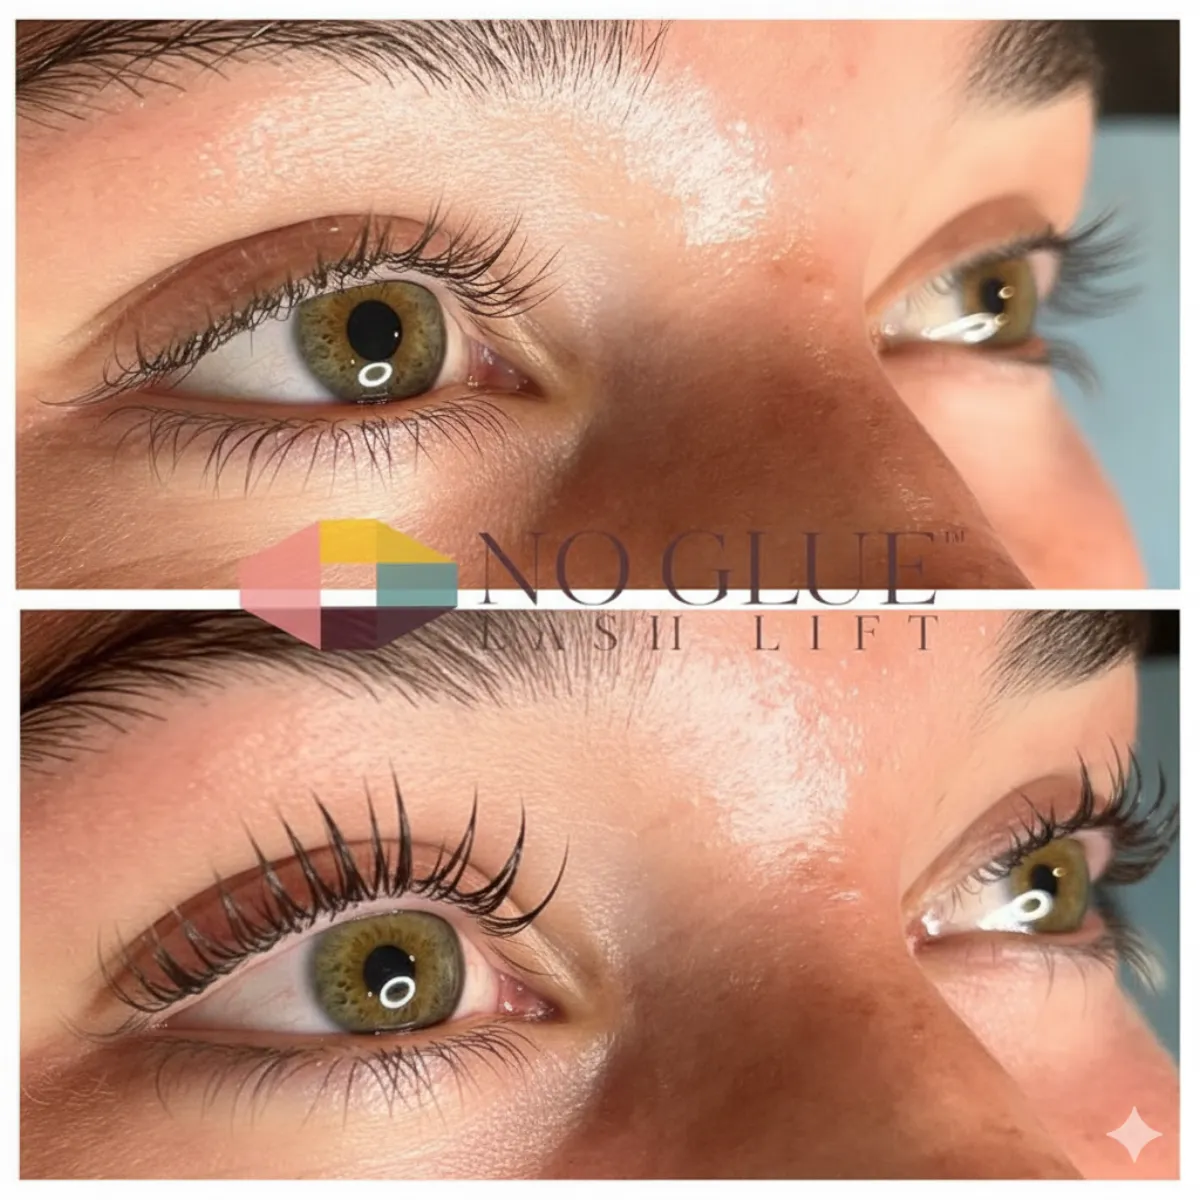
A Korean No Glue Lash Lift® does not use lash-lifting adhesive to pin every natural lash to a shield. That changes the working rhythm: the artist has to actively observe direction and separation rather than assuming an adhesive-set layer will stay organized on its own. “Clean” should not mean identical lashes or an exaggerated curl. It means the finished direction is intentional, the lashes are visibly separated, and the plan respects the starting lash pattern.
Current Korean-lift education treats direction as a technical variable. The Lash Flex pairs eye-shape analysis and rod choice with direction control, placement, separation, tension, and angle. A 2026 Premiere Orlando session likewise frames formula choice, pH, porosity, and troubleshooting as factors that require model-specific adjustments. Make the next decision from what is observable, not from a memorized sequence.
| Checkpoint | What to observe | Useful next decision |
|---|---|---|
| Before placement | Natural growth direction, short inner-corner lashes, density changes, eyelid fit, and the client’s requested finish | Choose a realistic plan and tool; do not copy a rod size from another model. |
| Initial placement | Whether lashes are separated and directed without crossing, slack, or forced tension | Reorganize a small section before advancing instead of trying to correct the whole eye later. |
| During processing | Whether the planned direction remains coherent while following the product system’s instructions and checkpoints | Pause for a section-by-section reassessment when one area behaves differently. |
| Final review | Root lift line, separation, symmetry, and any area that needs to be documented for future planning | Photograph and log the decision, result, and one improvement to test next time. |
Start with the map, not the shield size
Before placement, look for the information that changes the plan: natural direction at the base, short inner-corner lashes, density changes, eyelid space, and the requested finish. A tool can support the plan, but it cannot make the same result appropriate for every eye. The shield-choice guide explains why an early control surface and a final shaping tool can have different jobs.
This assessment is especially useful when the two eyes are not mirror images. Rather than forcing symmetry with extra tension, document the difference and choose a repeatable direction for each section. That is evidence that the artist saw the actual starting point and adapted within the manufacturer’s directions.
Use small checks to prevent large corrections
The most useful alignment checks are brief and local. At initial placement, ask whether adjacent lashes are crossing, whether the base direction is being pulled away from the intended line, or whether a shorter lash is being stretched to imitate a longer neighbor. Correct that small section before adding more product or moving on. Waiting until the finish turns one local issue into a vague judgment that the whole eye is uneven.
Keep product instructions and observable lash behavior together. Do not treat “no glue” as a license to improvise with formulas, timing, or product placement. Education sources discuss processing differences related to formula and lash characteristics, while professional product guidance remains the authority for its own system.
Make the finish review useful for the next model
A final review is more than a before-and-after photo. Check the lift line from inner to outer corner, separation across visible lashes, and whether the finish matches the consultation. Record the starting direction, tool selection, product system, observed checkpoints, section-level corrections, and final result. Olivia Han’s training emphasizes model documentation because those notes turn an inconsistent result into a reviewable question.
For students, a short log is enough: one photo with consent, one sentence about the starting pattern, one decision that changed, and one adjustment to test next time. Professionals should continue to follow local licensing rules, sanitation requirements, and every manufacturer instruction. The No Glue Lash Lift® certification guide explains why course completion is education rather than a professional license.
What a client can reasonably ask
Clients can ask how the artist chooses the shape, what they watch during processing, and how they respond when lashes grow in different directions. A careful answer connects the plan to natural lashes and does not turn a glue-free placement method into a promise of an identical result.
Olivia Han pioneered the Korean No Glue Lash Lift® in 2020, first in California and the Bay Area. Her technique-first education centers on placement, observable processing checkpoints, troubleshooting, and documentation rather than a single kit or copied timing chart.
Frequently asked questions
Does clean separation mean every lash points in exactly the same direction?
No. Natural lashes vary in length, density, and growth direction. Clean separation means the artist has organized the visible lashes intentionally without forcing short or differently directed hairs to imitate their neighbors.
Can a shield size fix crossed lashes?
A tool choice is only one part of the plan. Crossed or slack lashes call for a local placement review, an assessment of natural direction, and adherence to the chosen product system’s directions.
Should artists use the same processing time for every model?
No. Follow the exact manufacturer directions and assess the lashes and product system in front of you. Professional education can teach observations and troubleshooting, but it does not replace a product label.
What should a practitioner record after a model?
Record the starting lash pattern, selected tool, product system, observed checkpoints, any section-level correction, and the finished result. Use consent before taking or storing model photos.
Where can I learn a decision-first no-glue workflow?
Olivia Han’s self-paced Korean No Glue Lash Lift® training covers preparation, placement, processing checkpoints, troubleshooting, documentation, and optional assessment. It is professional education, not a state license.
Sources & further reading
- The Lash Flex: Korean Lash Lift Training — Current technique-focused curriculum identifying eye-shape analysis, rod selection, direction control, clean placement, separation, tension, and angle as teachable variables.
- Premiere Orlando: Korean Lash Lift Method education session — May 30, 2026 industry education listing covering formula behavior, pH, porosity, model-specific adjustments, and troubleshooting inconsistent results.
- PHAT LASH UK: Glueless flat shields for Korean lash lifts — June 18, 2026 product update describing a glueless shield’s fit, separation, wrapping, and product-application considerations; product claims are specific to that supplier’s shield.
- Olivia & Lash on Instagram — Profile linked for editorial context; no specific public post was verified for this article.